Showing posts with label Tips and Tricks. Show all posts

Wednesday, March 7, 2012

"In Brightest Day..." Part I

So I figured I'd toss in a few older cosplay things in to shake things up...

To wit: Green Lantern

This one is my first costume since getting back into the fray... and quite frankly it came about as myself and AV sitting around wondering if we were going to do anything for Hallowe'en that year...
Parallel to this, I had been re-engaging with people I had not interacted with in a long time since I moved from Toronto more than a decade ago (see? Facebook has its uses!)
To draw the timeline, I started connecting with Liana K, who had comments on her feed from (or commented on, I honestly cannot remember) a number of other cosplayers... to whom I sent tentative "Err, um... could I ask a question?" messages with regards to advice on starting and/or purchasing costumes...
Which sent me to Norman at Heroes In Tights.

Long story short, I had my Green Lantern duds... now... what about the ring?
I'm not one to do things half-assed... and I wanted a ring that lit up... but not just light up and be all blinky-blinky... I wanted a ring I could light ON COMMAND.

So... I got myself a couple of those 'Brightest Day' Green Lantern promo rings they were giving out a few years back and set to work.

I read online about a few people who rigged existing rings to carry a larger battery output... and decided to go at it from that angle.
But *I* wasn't going to have to take my ring off to light it up.

What I did was take one of the 'Darkest Night' promo rings and cast it in Oomoo in order to make a 'master' mold of it... then colour-dyed some ClearCast and made this ring...

Now... the thing with Oomoo is that it's a flexible rubber-type compound... so it's good for small objects... but you will need to allow for gas escape. The bubbles created with the SmoothCast compound mixture are (to the best of my knowledge) carbon dioxide... which means that they will need to escape... the PROBLEM is that the resin that forms hardens rather quickly, so the odds of you getting ALL of the bubbles out is almost nil, unless you have a compressor-type setup... which I don't. But that's okay.

Make a mold of the ring and what are called 'vent sprues' (the channels that will help to allow some gas to escape). What I did was take some wax and glued it (temporarily) to the ring bottom and had a small plug leading off from the side of the ring down by the ring face... if you look at some of the cheaper versions of ring-like toys, you can see a small section (along a seam probably) where there's an area of bumpy roughness... that is probably where a vent sprue was connected to the ring.

To save on Oomoo, make the mold 'box' as small as you can (I used an old vitamin pill bottle sliced in half)... the 'box' needs to have one solid bottom and solid sides all around... and enough room that the Oomoo can completely cover the ring... don't worry about the vent sprues, they will get covered because they are glued to the bottom of the 'box'.
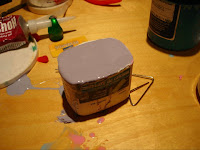
Pour the Oomoo slowly... but not TOO slowly... but slowly enough so that it doesn't bubble. None of my molds did, and I practiced a few times with varying sizes of vent sprues... be sure to fill all the way up to over the top of the ring face.
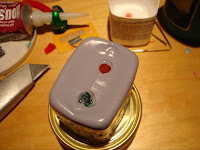
Once your mold sets, you can pop it out of the 'box' as best you can and start the VERY CAREFUL slicing of the mold. Small cuts with an exacto blade, slow and careful all the way down to the ring.
Don't forget that you have a chunk of Oomoo on the inside of the ring band to deal with as well... the object of this cutting is to NOT cut the mold completely in half, but to slice JUST ENOUGH to be able to pop the ring out... so about 1/2 of the mold or so.
If you do well, you should be able to slip the mold back into the 'box' and it will sit flush with itself with little to no evidence of any cutting having happened at all!
(I'll see if I can dig up some photos of cutting... I'll be doing another set of molds in the days to come, so I'll eventually have an example to share)

So now you have a mold. Slip it back into the 'box'... but put it in UPSIDE DOWN. Trust me.
You see the holes (from the vent sprues you glued to the bottom of the box before?) that's where you will be pouring your resin into the mold.
NOW you make your resin mixture. SmoothCast is the stuff I used... it's (relatively) inexpensive and didn't take a lot of effort to use. Shake each canister and then mix them (50/50 mix, just like the Oomoo) and pour slowly together... you WILL make bubbles, so don't fret about that... try to mix slowly with a popsicle stick or similar to minimize the extra bubbles you make... and you can TRY (valiantly) to remove/pop some of the bubbles... but you will frustrate yourself if you can't get them all... so do your best. For coloring, you can get a dye that colours plastics (at the same place you got your SmoothCast and Oomoo)... two drops will do you.
Yes, it's a colossal waste... and theoretically you will be able to make hundreds of rings from one bottle of dye. That is unavoidable.

Mix your resin and dye, and pour slowly into the vent sprue that was closest to the ring band. It can also help if you tilt the mold one way or another to help the resin slide down to the bottom where it needs to be... but don't take too long with this part. You have maybe a 5 minute window before the resin solidifies.

(And don't worry about screwing it up... some times the resin mix simply will not take and it ends up being a tacky blechy mess... scrape it out as best you can from the mold and try again)
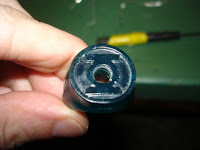
If/When you are successful, you will have a ring that is translucent green!

Yay!

... now drill a hole out of the middle of the lantern.

There's method to my madness.
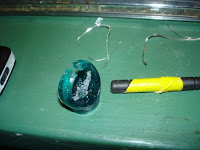
I also used a dremel tool to chisel out a groove on the inside of the band of the ring, connecting all the way to the hole... and I also poked/drilled two small holes in the band near the opening at the base... the reason for which will be clear later.

Stay tuned!

Tuesday, March 6, 2012

Progress shots and Riveting pictures!

I have come to love rivets.
Don't ask me how this came to be... but holy heck I have been able to move quite a bit faster now that I've gotten the hang of it...
It basically takes a certain level of 'willingness to sacrifice' a piece or three in order to accomplish your goal.
Which is why I started with the ribs and lumbar pieces... they're small, few cuttings to assemble them (if things went wrong, which they didn't - WOO!) and the results are pretty rapid to see.

So... here was the problem:
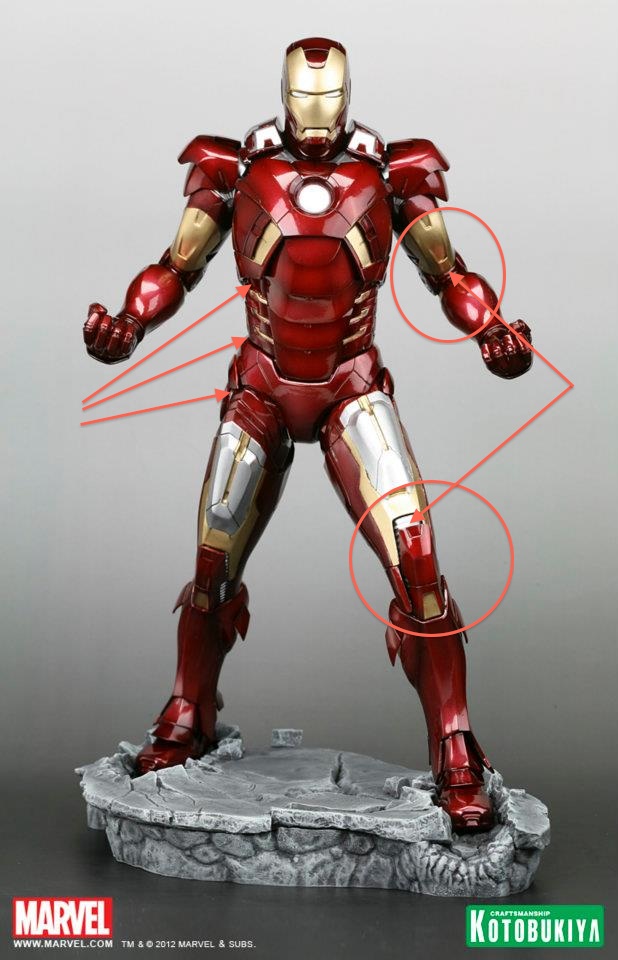
Three rib plates per side, which articulate with the lumbar plates, and also with the back and the cod-piece at the sides and rear.
But HOW? How much range of motion do I want to have versus how much restriction of motion do I want to force myself to endure? I figure I should be able to move a LITTLE bit... if nothing else that will allow my core muscles to engage enough to not fatigue my back while wearing the armor.
Trust me... that part is more important than you think.

Moving on... I figured I didn't want TOO much movement, but if 'push came to shove', I wanted to be able to have some side-bending and flexion/extension through my abdominals/obliques/lumbar extensors... so a small amount of articulation would be enough.
My original thought was a tough-yet-elastic fabric to go underneath all the pieces... but that would a) require articulation with the pieces anyway... and b) require me to FIND a fabric like that.
Good luck, by the way... I challenge anyone to find that fabric before I tame this Pegasus over here.
The problem is... the rib plates aren't exactly a large mass of terrain to attach things to, plus they will need to be Bondo'd like everything else... so bolt-and-nut assembly was out.

The answer?
Rivets.
Flat, reasonably flush with the outside and secure enough to attach straps!
(More on that as progress continues!)
For now, though... elastic strapping will serve my purposes nicely. I sliced some segments (2-3" long) and riveted them along one side of a rib section... then, with a little bit of elbow grease, pulled them to the other rib section and fastened them down... not tight enough to strain the elastic overly (else it might very likely have torn the hole away) but enough to make it 'snug'.

On the OUTside of the ribs, I tried to keep the rivet holes as evenly spaced and uniform as possible... and the end-result seems to be okay. Keep in mind that these will ALL be covered completely with Bondo... so any external evidence will be hidden completely from view.
That will happen some time this week as well. I find there is just enough play in the elastics between the ribs to pry them apart a little... but if it proves to be too difficult, I will slather right along the cracks between the rib sections and then slice them apart and smooth the Bondo in-between with a putty knife or similar small tool.


Also... a bit of 'learning as I go' here... the top panel of the lumbar pieces seems to not fit well with the rest... and the entire apparatus is WAY too large (the back plus four lumbar panels plus the cod) and it appears I'd have to be a lot taller to fit into the set-up.
I think I solved that problem, though... the top panel of the lumbar seems to fit underneath the bottom-most articulation point of the back piece... so when I slice apart the cod (into front and back halves) I will have three visible lumbar panels (the topmost 'hiding' under the back piece).
Stay tuned, for that, though... it may not work. LOL

As it stands, though, the rib panels connected to the lumbar panels quite nicely... once they're perma-connected to the back and codpieces, then I'll have a decent starting-point to go from... and the entire set-up will be ready for the Bondo treatment!
Stop starin' at my butt!

Arm-adillo articulation! (Hur hur!)


More pics on the elbow bands...
I decided that 7.5" was a bit large for the space, so I scaled the pieces down a bit... 6.5" and 1.5" wide per band... and it seems to work quite well!

These first two pics are a view from the outside looking into the crook of the elbow... the new (smaller) pieces I cut out of the plastic 4L icecream tub lids... AV's grandmother was a sculptor and kept tons of them as paint palletes. The end result is more flexible than the harder plastic I used for the larger pieces and able to not only articulate within the elbow and the significant degree of flexion required, but due to the smaller amount of space I needed to work with (inside), the thinner plates seem to be able to conform to the space a little easier.


Ice cream! Mmm!
The next two pics are looking at the pieces and plates from the inside... and seeing how tightly the plates are able to conform to the inside of the arm pieces. This week sometime I will be riveting the elbow 'banding joint' to the arm pieces, then covering it and Bondo-ing the arm pieces for their second layer. I'll also be re-configuring some bands for the back of the elbow and the front of the knee joints... as they have a bend 'away' and increase their angle in respect to each other, I have to make the pieces a little fancier so as to allow them to stay articulated without 'gapping' and pulling apart and (let's face it) looking sloppy.

Stay tuned!


Monday, February 27, 2012

Armadillos and Pillbugs and Seams, Oh My ! (Part I)


Alrighty... here's the sit-rep. I know you've been waiting with bated breath for my solution for the elbow, knee and hip gaps... and here it is.

Feel free to insert heroic fanfare, anytime.

First, you're going to need a few things... one of those hand-rivet jobbies (they're around $25 or so unless you go all bells-and-whistles on it... and really you aren't going to need to punch any rivets stronger than aluminum... so there's no point unless you have OTHER projects. Oh yeah... and rivets. In the pics below I used 1/8" diameter (short) rivets... which means they have a length of 1/8" as well.
What does this mean? I'm sure it's crucial in SOMEone's world... suffice to say... I WOULD have gone with 'medium length rivets (1/4") but I didn't read the package before I bought 'em.
"Caveat emptor" and all that.
Read on.
Anyway... you'll also want to practice a little to get things right. My first thought was to go with bands overlapping - like the pillbug or (if you're a classic X-Men comic fan, Colossus's skin)... but then I saw a video by a Replica Prop Forum guru by the name of Starx... and HE gave me the idea to cut a slice into one side of each piece to add a little more range of motion to them. This will be perfect for the ranges that will need to bend MORE than the others (elbow flexion, knee flexion) and the extension sides will be fine with straight panels (so far as I am estimating... by the time I get around to them, that mindset may very well change LOL)
So here we have a panel... I suggest cutting one (or a bunch of them) out of some of your extra (or used) cardstock to get an idea for how it all works... use the correct tip on the rivet 'gun' that fits your rivet properly, insert the slim end of the rivet into the rivet gun, the snub end of the rivet will go into the hole of your pieces... pump once or twice (or three times if you have smaller hands making sure your rivet is fully inserted against the rivet gun 'tip'... and SNAP!
Rivet pop away, the remainder (a small shaft of the leftover aluminum) is discarded.
Now... here's where Starx (from the RPF) and the hardware store guy you will ask for these materials get to shine again.
BUY RIVET WASHERS!
They're small, they SEEM innocuous, but try doing a rivet without one first... and see the tip of the rivet... how it sorta gets all semi-bent and crumply... now slip a washer onto the end after you stick the rivet through your drilled holes and see what happens. The rivet - when it is being compression-forced into its new shape - has little room to expand inside the
Paper bands and no rivet washers equals crumply mess with no strength.
washer, so it goes around it and makes a really firm fixation point.

The difference is night and day.

So now you need some materials... something flexible - Starx recommended some waste-bins you can buy at a retail store, I used (snicker) an empty kitty-litter bucket. So long as the plastic is flexible enough to work with, whatever you use should be fine.
I bought a couple of those larger Rubbermaid bins which I plan to use for the leg bands, as I need larger slices... and I just don't have that many kitty litter buckets LOL!

So once you have your slices - for the arms, I made mine 2" wide and 7.5" long, but I have a fair bit of arm to cover, estimate a length of just inside (towards the elbow) from the mid-point of the bicep to the midpoint of the forearm... I used 9 pieces, but I could have gotten away with eight. You might find some different success with less-wide pieces (as the less wide they are, the more range of flexion you will have, but the greater potential risk of 'exposure' if the panels should come away. Truthfully, there's little chance of that happening... I just like round numbers. =)
Once you have your pieces, trace them with a sharpie marker onto your plastic thing and cut them out. I used tin snips... but then I tend to overkill everything. If your plastic is reasonably thick, regular scissors just won't... erm... 'cut it'... so save yourself the hassle, I say.

Each piece (regardless of whether you slice a wedge out of one side) I punched two holes in on ONE side, 1/2 inch from each edge and 1/2 from the side... if you want to do the wedge the way I did mine, it's an inch in from wither side and 1/2 inch deep. To keep things reasonably accurate and lining up, hold the adjoining pieces together when you drill (yes drill - this is plastic) the holes... and make sure you have something underneath that you can drill into!

Now the rivets! They should go in fairly easily without too much fuss at this point. The fuss comes momentarily.
See... in order to get everything lined up properly, as being bent will be the default position for these bands (we're doing the inside elbow, don't forget) to rivet them all with the bands lying flat would screw it all up and warp the look. So bend 'em. Here's where it takes a bit of manual dexterity to fold each piece, align them s best you can with one hand and drill the holes with the other hand... then AS YOU GO ALONG - rivet each one as you drill the holes.
Your end product should look something like this:

But that picture doesn't really give it the justice it deserves.
So here's one with be clutching the assembly so that it shows the 'bend' that will cover the arm and elbow gap (left) and articulating bands...
... and here's a shot of the assembly with a bit of an 'elbow bend' coaxed into it to show how the piece will conform to movement (right). I figure I have around 120 degrees of flexion altogether with it... which is more, incidentally than the upper-lower arms pieces of the armor will actually allow.

Not bad, eh!  Props once again to Starx and the RPF for setting me right on the path once I started tripping down it blindly.

Oh... and just for the sake of a little tongue-in-cheek humour and a display of the rivet washers in action... no, I WASN'T kidding when I said I used a kitty litter bucket. =)

Yes, I washed it first. Sheesh!


Thursday, February 23, 2012

Armadillos, Pillbugs and Seamless Costumes...


Alrighty.
I'm almost at the point where I have all 'workable' (as in "not-boot") pieces resined and fiberglassed... so this weekend I will probably be stitching together some straps to form an under-harness... probably to connect to the brace...
I'll see if I can throw together a better illustration than my chicken-scratched notepad etchings... but I figure since I'll be showing the finished product to you, that will suffice to get the basic idea.
Folks are more than welcome to toss me an email or PM and ask, though =)

BECAUSE I'm at the point where I should be thinking about 'assembly' (aka "how the whole thing is going to fit together and stay on") I was thinking about all the example costumes there are out there (and how awesome they all are, incidentally - you guys all rock! Props to the Replica Prop Forum!)...
... and also how most of them seem incomplete to me. By 'incomplete', I mean "missing some finishing touches".
Specifically, the elbow joints, the knees, the hips and the waist... and under the arms.
It's pretty clear in most pics - especially these ones - that the 'under-armor' is some sort of articulated plating/scaling... the purpose of which, presumably, to act as reinforcement for the joints between the larger armor pieces.

So how do I make them.
Enter the mighty armadillo (and/or the pill bug):

(As a science-nerd side-point, the pill bug's Genus is "Armadillium" =P )

Have a close look at how both critters have tightly-interlocking plates, such that when they adopt their defensive postures (coincidentally, both 'rolling up' into a ball) the plates continue to be interlocked, providing a protective shell while still maintaining flexibility... and when the critters are 'normal' (seen above) the plates are present - and still articulated - but it's not impossible to move.

I have a plan... (stay tuned!)

Sunday, February 19, 2012

Use Protection.


Seriously. Some of the stuff you're going to be working with is NASTY!
Like 'hazardous chemicals' nasty.

Fiberglass resin, for example, is a two-part liquid plastic that consists of a quantity of resin and a smaller quantity of catalyst or hardener.
Adding the hardener to the resin causes the liquid resin to cure to a very hard, yet brittle plastic; the more you deviate from the manufacturer's specification. Using this resin in combination with a weaved-fiberglass cloth yields a reinforced composite material that is strong, lightweight and rigid.

Polyester resin is a particularly dangerous material because of the fumes that it gives off in an unmixed state and during the curing process. Short-term effects of these fumes are dizziness, nausea and skin irritation. Long term effects of overexposure can include nervous system (brain) damage, asphyxiation, and cancer related hazards.

Yeah. The big 'C'.

As for Bondo
(which is a brand name, you'll note the same name on the can of resin), it's basically an auto-repair putty, commonly referred to as a 'body filler'. This stuff mixes with with a hardener as well (an organic peroxide), and turns into a putty which then sets and becomes rock-hard.

Then there's the aerosolized glue.
Seriously... what would make it a good idea in ANY universe to inhale that?  o.O

As for precautions and the like... use common sense.
Resin especially has fumes (as stated above)... a mask that covers nose and mouth and filters the air would be a BIG help... as in safety protocols with these products actually require the use of an organic vapour respirator. If and when you start sanding, there will be particulates flying through the air. When you're wearing your safety goggles that cover your eyes completely, watch closely at the particles of the resin... those tiny tiny fibers of fiberglass? You'd be getting those in your eyes... breathing them without a respirator.
It's a bad scene.

Also, this stuff can and will irritate exposed skin... so wear nitrile or latex gloves whenever you handle it... and be sure to wear clothes you EXPECT to wreck... you ARE going to get some of this stuff on your clothes... and they WILL then be wrecked.

If you use anything more powerful than hand-held sandpaper, use tougher gloves and long sleeves... having a power drill tear a slice into your arm or bruise you if it gets out of control.
Yeah... it can happen.
Trust me.

Be cautious. That's all there is to it. The risk to your health for slipping up on your safety precautions or taking shortcuts just isn't worth it.

Saturday, February 18, 2012

Turn Up the Heat!

Forming the pieces to your body will be easy in some cases (like the bicep pieces) while it will be a right pain in the @$$ with other pieces. I mean... let's face it... you'll take the back off, put it on to feel the fit, and take it off again quite a few times before you're done... but it is vital that you get the correct shape for the piece BEFORE you use the Bondo on it.
Remember your duct tape dummy? Here's where it gets a moment to shine!
Hang your trouble pieces on the dummy... and heat form them there. If your dummy is anatomically as accurate as possible to your body frame,  you won't need to switch the pieces around quite so much and you can see the process from the outside looking in - a new perspective!


As for WHAT you use to heat form, I used - yes, seriously - a hair dryer. That's all the heat you will need. If you don't have one, you won't need to spend more than $10 on one to get the heat required.
Use your mask, though... heated resin particulates smell just as nasty as wet resin.

With the back piece especially (but the chest as well) you can use the dummy to hang the piece while you heat it.  You'll need to experiment on your own a little fore this part... there's a 'tolerance point' of heat for the resin... up to that point, it's semi-pliable as far as heat goes... but once you reach that point, it becomes a lot easier to work with.
Be careful you don't bend things too far (this is why we have multiple coats both outside and inside the pieces)!


For larger pieces, duct tape the snot out of it, then heat form it directly on your dummy... your dummy is reasonably close to your body shape, so even if you move a section too much, it is still much more recoverable than flipping the pieces on and off your body... and a lot faster!

An extra hint for the back piece? Duct tape it down as you are heating it; come in over the next day or two and give it a quick once-over with the hair dryer while you're working on other pieces... bu the end of it the back piece should be contoured much more closely to your own back's shape.

As for the resin, it will 're-dry' as it cools and the new shape will be more-or-less kept... and now you can get a better idea as to how everything is supposed to fit together!
"Oh THAT'S where that goes!"

Thursday, February 16, 2012

Duct Tape Dummy

Now that we're going full-tilt and getting into the resin part of the process... you're going to run into a bit of a snag in terms of not only specifically shaping the pieces to fit the contours of your body properly... but where to put them all.
... 'cause there's a lot of them... and some of them take up a fair bit of space.

I give you: the duct tape dummy.
I went to a local thrift shop and purchased a long-sleeved t-shirt and trackpants that were a size smaller than I usually wear - so as to avoid bagginess in the clothes. Put those clothes on, then find somebody you trust to wrap your body with the duct tape around the clothes you're wearing.
All the way... ankles (or as close as your clothes get) to wrists and everywhere in-between.

You will not be able to move much and don't make it TOO tight... make sure you can still function and bend a little... you won't get much movement, but you don't want a lot... just enough to not have your hands and feet fall asleep from lack of circulation.
Think of it as a really tight wetsuit.  =)

When you're done... and here's where the trust comes in... you are going to get your assistant to cut you out of the duct tape.
VERY CAREFULLY!

(To the assistant:
Use scissors, but be ginger when you're going up the forearms and calves... YOU may not feel like you're stabbing the dummy, but THEY sure feel it!)
Once up each calf and forearm to the elbow (or so) then down the back (again - CAREFULLY!) to just around the waist line should do it... that should be enough to wiggle out of the duct tape suit. If not, cut a little more until you can.
Once you're cut out of the duct tape prison, you're going to want to figure out how you're going to MOUNT your dummy (dirty! LOL)
Some people have used thicker dowling or broom-handle poles in the legs, I've also seen a single piece of rod stuck through the middle. I found an iron bar croinked into a shape vaguely resembling a coat hanger with a long neck, so I stuck THAT inside the chest cavity of my dummy as I was stuffing it, then sealed up the neck fairly tightly... and hung him from the basement rafters like an effigy.

To STUFF your dummy, use duct tape and seal the calves and forearms back up, then 'tie off' the ends. So your dummy has no hands and feet... oh well. Go up the back to the neck again after you stuff some rags or some kind of non-toxic stuffing material into the legs. Stuff the torso and arms from the neck hole, then go around the neck until you're happy that the stuffing won't come out.

Now you can drape your armor bits and pieces on the dummy and see how they fit! (More or less...)


You won't get an exact measurement on your dummy... and the dummy will probably bulge a bit in areas... oh... go around the midriff of the dummy a few times and do some crotch-over-the-shoulder loops as well. The weight of the stuffing will pull your dummy apart at the middle if its legs aren't supported.

"Bits my shiny, metal ass!"