So I figured I'd toss in a few older cosplay things in to shake things
up...
To wit: Green Lantern
This one is my first costume since getting back into the fray... and quite frankly it came about as myself and AV sitting around wondering if we were going to do anything for Hallowe'en that year...
Parallel to this, I had been re-engaging with people I had not
interacted with in a long time since I moved from Toronto more than a
decade ago (see? Facebook has its uses!)
To draw the timeline, I started connecting with Liana K, who had comments on her feed from (or commented on, I honestly cannot remember) a number of other cosplayers... to whom I sent tentative "Err, um... could I ask a question?" messages with regards to advice on starting and/or purchasing costumes...
Which sent me to Norman at Heroes In Tights.
Long story short, I had my Green Lantern duds... now... what about the ring?
I'm not one to do things half-assed... and I wanted a ring that lit up... but not just light up and be all blinky-blinky... I wanted a ring I could light ON COMMAND.
So... I got myself a couple of those 'Brightest Day' Green Lantern promo rings they were giving out a few years back and set to work.
I read online about a few people who rigged existing rings to carry a larger battery output... and decided to go at it from that angle.
But *I* wasn't going to have to take my ring off to light it up.
What I did was take one of the 'Darkest Night' promo rings and cast it in Oomoo in order to make a 'master' mold of it... then colour-dyed some ClearCast and made this ring...
Now... the thing with Oomoo is that it's a flexible rubber-type compound... so it's good for small objects... but you will need to allow for gas escape. The bubbles created with the SmoothCast compound mixture are (to the best of my knowledge) carbon dioxide... which means that they will need to escape... the PROBLEM is that the resin that forms hardens rather quickly, so the odds of you getting ALL of the bubbles out is almost nil, unless you have a compressor-type setup... which I don't. But that's okay.
Make a mold of the ring and what are called 'vent sprues' (the channels that will help to allow some gas to escape). What I did was take some wax and glued it (temporarily) to the ring bottom and had a small plug leading off from the side of the ring down by the ring face... if you look at some of the cheaper versions of ring-like toys, you can see a small section (along a seam probably) where there's an area of bumpy roughness... that is probably where a vent sprue was connected to the ring.
To save on Oomoo, make the mold 'box' as small as you can (I used an old vitamin pill bottle sliced in half)... the 'box' needs to have one solid bottom and solid sides all around... and enough room that t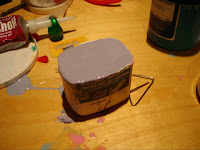 he Oomoo can completely cover the ring... don't worry about the vent sprues, they will get covered because they are glued to the bottom of the 'box'.
Pour the Oomoo slowly... but not TOO slowly... but slowly enough so that it doesn't bubble. None of my molds did, and I practiced a few times with varying sizes of vent sprues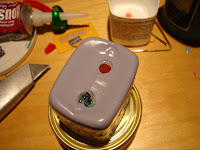 ... be sure to fill all the way up to over the top of the ring face.
Once your mold sets, you can pop it out of the 'box' as best you can and start the VERY CAREFUL slicing of the mold. Small cuts with an exacto blade, slow and careful all the way down to the ring.
Don't forget that you have a chunk of Oomoo on the inside of the ring band to deal with as well... the object of this cutting is to NOT cut the mold completely in half, but to slice JUST ENOUGH to be able to pop the ring out... so about 1/2 of the mold or so.
If you do well, you should be able to slip the mold back into the 'box' and it will sit flush with itself with little to no evidence of any cutting having happened at all!
(I'll see if I can dig up some photos of cutting... I'll be doing another set of molds in the days to come, so I'll eventually have an example to share)
So now you have a mold. Slip it back into the 'box'... but put it in UPSIDE DOWN. Trust me.
You see the holes (from the vent sprues you glued to the bottom of the box before?) that's where you will be pouring your resin into the mold.
NOW you make your resin mixture. SmoothCast is the stuff I used... it's (relatively) inexpensive and didn't take a lot of effort to use. Shake each canister and then mix them (50/50 mix, just like the Oomoo) and pour slowly together... you WILL make bubbles, so don't fret about that... try to mix slowly with a popsicle stick or similar to minimize the extra bubbles you make... and you can TRY (valiantly) to remove/pop some of the bubbles... but you will frustrate yourself if you can't get them all... so do your best. For coloring, you can get a dye that colours plastics (at the same place you got your SmoothCast and Oomoo)... two drops will do you.
Yes, it's a colossal waste... and theoretically you will be able to make hundreds of rings from one bottle of dye. That is unavoidable.
Mix your resin and dye, and pour slowly into the vent sprue that was closest to the ring band. It can also help if you tilt the mold one way or another to help the resin slide down to the bottom where it needs to be... but don't take too long with this part. You have maybe a 5 minute window before the resin solidifies.
(And don't worry about screwing it up... some times the resin mix simply will not take and it ends up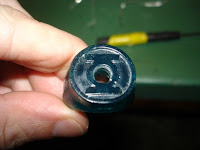 being a tacky blechy mess... scrape it out as best you can from the mold and try again)
If/When you are successful, you will have a ring that is translucent green!
Yay!
... now drill a hole out of the middle of the lantern.
There's method to my madness.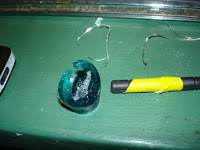
I also used a dremel tool to chisel out a groove on the inside of the band of the ring, connecting all the way to the hole... and I also poked/drilled two small holes in the band near the opening at the base... the reason for which will be clear later.
Stay tuned!
To draw the timeline, I started connecting with Liana K, who had comments on her feed from (or commented on, I honestly cannot remember) a number of other cosplayers... to whom I sent tentative "Err, um... could I ask a question?" messages with regards to advice on starting and/or purchasing costumes...
Which sent me to Norman at Heroes In Tights.
Long story short, I had my Green Lantern duds... now... what about the ring?
I'm not one to do things half-assed... and I wanted a ring that lit up... but not just light up and be all blinky-blinky... I wanted a ring I could light ON COMMAND.
So... I got myself a couple of those 'Brightest Day' Green Lantern promo rings they were giving out a few years back and set to work.
I read online about a few people who rigged existing rings to carry a larger battery output... and decided to go at it from that angle.
But *I* wasn't going to have to take my ring off to light it up.
What I did was take one of the 'Darkest Night' promo rings and cast it in Oomoo in order to make a 'master' mold of it... then colour-dyed some ClearCast and made this ring...

Now... the thing with Oomoo is that it's a flexible rubber-type compound... so it's good for small objects... but you will need to allow for gas escape. The bubbles created with the SmoothCast compound mixture are (to the best of my knowledge) carbon dioxide... which means that they will need to escape... the PROBLEM is that the resin that forms hardens rather quickly, so the odds of you getting ALL of the bubbles out is almost nil, unless you have a compressor-type setup... which I don't. But that's okay.

Make a mold of the ring and what are called 'vent sprues' (the channels that will help to allow some gas to escape). What I did was take some wax and glued it (temporarily) to the ring bottom and had a small plug leading off from the side of the ring down by the ring face... if you look at some of the cheaper versions of ring-like toys, you can see a small section (along a seam probably) where there's an area of bumpy roughness... that is probably where a vent sprue was connected to the ring.
To save on Oomoo, make the mold 'box' as small as you can (I used an old vitamin pill bottle sliced in half)... the 'box' needs to have one solid bottom and solid sides all around... and enough room that t
 he Oomoo can completely cover the ring... don't worry about the vent sprues, they will get covered because they are glued to the bottom of the 'box'.
Pour the Oomoo slowly... but not TOO slowly... but slowly enough so that it doesn't bubble. None of my molds did, and I practiced a few times with varying sizes of vent sprues
 ... be sure to fill all the way up to over the top of the ring face.
Once your mold sets, you can pop it out of the 'box' as best you can and start the VERY CAREFUL slicing of the mold. Small cuts with an exacto blade, slow and careful all the way down to the ring.
Don't forget that you have a chunk of Oomoo on the inside of the ring band to deal with as well... the object of this cutting is to NOT cut the mold completely in half, but to slice JUST ENOUGH to be able to pop the ring out... so about 1/2 of the mold or so.
If you do well, you should be able to slip the mold back into the 'box' and it will sit flush with itself with little to no evidence of any cutting having happened at all!
(I'll see if I can dig up some photos of cutting... I'll be doing another set of molds in the days to come, so I'll eventually have an example to share)
So now you have a mold. Slip it back into the 'box'... but put it in UPSIDE DOWN. Trust me.
You see the holes (from the vent sprues you glued to the bottom of the box before?) that's where you will be pouring your resin into the mold.
NOW you make your resin mixture. SmoothCast is the stuff I used... it's (relatively) inexpensive and didn't take a lot of effort to use. Shake each canister and then mix them (50/50 mix, just like the Oomoo) and pour slowly together... you WILL make bubbles, so don't fret about that... try to mix slowly with a popsicle stick or similar to minimize the extra bubbles you make... and you can TRY (valiantly) to remove/pop some of the bubbles... but you will frustrate yourself if you can't get them all... so do your best. For coloring, you can get a dye that colours plastics (at the same place you got your SmoothCast and Oomoo)... two drops will do you.
Yes, it's a colossal waste... and theoretically you will be able to make hundreds of rings from one bottle of dye. That is unavoidable.
Mix your resin and dye, and pour slowly into the vent sprue that was closest to the ring band. It can also help if you tilt the mold one way or another to help the resin slide down to the bottom where it needs to be... but don't take too long with this part. You have maybe a 5 minute window before the resin solidifies.
(And don't worry about screwing it up... some times the resin mix simply will not take and it ends up
 being a tacky blechy mess... scrape it out as best you can from the mold and try again)
If/When you are successful, you will have a ring that is translucent green!
Yay!
... now drill a hole out of the middle of the lantern.
There's method to my madness.

I also used a dremel tool to chisel out a groove on the inside of the band of the ring, connecting all the way to the hole... and I also poked/drilled two small holes in the band near the opening at the base... the reason for which will be clear later.
Stay tuned!